| Advance
Adapters Slipyoke Eliminator Story and Pictures by Keith Auble |
|
|
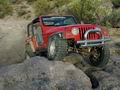
Anybody
that has gotten into four wheeling knows how important ground clearance
is. Most people also know the only way to get more ground clearance
is to get larger tires. Unfortunately with Jeeps it is a chain reaction,
in order to fit bigger tires you need more lift. After lifting your
jeep the driveline angle is increased causing sometimes severe vibrations.
There are two ways you can remedy this situation, one being the cheapest
and easiest way saving you money unfortunately it also costs you ground
clearance. The second way is more costly, however it also increases
the strength of your transfer case output shaft minimizing the chance
of breakage. |
|
|
The first way is to add a transfer case lowering kit, which includes spacers and longer bolts. This drops the transfer case skidplate which is also the transfer case mount. The second way and the preferred way is to install an Advance Adapters (http://www.advanceadapters.com) Slip Yoke Eliminator kit. |
 |
|
This kit was designed with lifted Jeeps in mind, the fixed yoke adds approximately 6" to the length of the driveshaft reducing the angle and eliminating the vibrations caused by lifting your Jeep. This article will show how easy it is to install the SYE and the advantages, follow along for the report. |
|

|
Step one is probably the hardest step since the bolts are real hard to get to, this step is not necessary but makes the job alot easier. You need to remove the transfer case from the vehicle, and also both front and rear yokes. Step two may be a little more difficult. Remove the oil slinger from the tail shaft, this oil slinger is designed to cover the oil seal to keep the transfer case from leaking, it is a pressed fit so it will take a little convincing to get it off. |
|
After removing the oil slinger, the seal needs to be removed. If you have the right tool for the job, this step is a cinch.. If not, a simple screwdriver will work. Once the seal is out, there is a variety of snap rings on the inside that will need to be removed. Before you remove the tail housing be sure to remove all of the snap rings. In my attempts to remove the tail, I missed one snap ring and cracked the oil pump. |
|
|
|
Now that all the snap rings are out of the way, it is time to remove the tail housing. Start by removing all the bolts. Use a pry bar to break the seal between the case and housing. This may take some work depending on how well it is sealed. The factory molds pry locations into the case to make this step easier. |
|
Now that the tail housing has been removed, it is time to split the case. Be sure to note which bolts come from where , since all the bolts are not the same. It's pretty simple so you shouldn't be intimidated. Just pay close attention to what goes where. |
Case after being split |
|
Time to Remove the output shaft. To do this, you need to pull the front output shaft straight out. When there is enough slack in the chain, it will come right off the rear output shaft. While you are this far into the transfer case, it is a good idea to inspect for any damage and repair it if there is any. |
|
|
After the chain is removed and out of the way it is time to remove the rear output shaft do this by pulling it straight out, it should come out with no problems. Notice the difference in size between the stock output shaft and the new Advance Adapters shaft. This is one of the main reasons I chose this kit. It may be a little more expensive but unlike other kits that you cut and drill the tail housing, this one replaces the output shaft, which is one of the weak links in the drive line. |
New output shaft vs. old output shaft |
|
|
Once that the shaft is out you will need to remove the snap rings holding the drive sprocket and change this over to the new output shaft. After this is complete go ahead and reinstall the rear output shaft, then reinstall the front output and chain. The case is now ready to be resealed. Make sure to clean the mating surfaces thoroughly and add a thin coat of silicone RTV for a seal. Be sure not to use to much or you will have quite a mess on your hands, the excess RTV could clog your internal oil pump or cause obstruction, reducing lubrication and prematurely ending the life of your transfer case. |
|
Now that half the case is shiny (cause we all know you cleaned it when you where stripping the old gasket) it is time to install the oil pump. Be sure to have the pickup tube seated completely or it may not stay in there. Once the oil pump is in place install the speedo gear and snap ring, then install the new tail housing. |

|
|
|
Be careful and use the proper bolts and don't forget the wiring mounts. Now reinstall the transfer case in the vehicle, be sure to put the Speedo housing back in the proper angle or your Speedo will not work. This is how the transfer case will look after it has been cleaned up and the slip yoke eliminator installed. |
|
That wasn't so tough was it. I dreaded doing this for a couple months before it finally got done. I was really surprised at how easy it was and how little time it really did take. Since this is the first time I have taken a transfer case apart, I was quite intimidated, but seeing how simple the insides are it did not last long. After completing the SYE I measured for my new driveshaft it gained a total of 5 1/2" this may vary from vehicle to vehicle, you must complete the installation before measuring for the new rear driveshaft DO NOT assume that it will gain 6" cause it might only gain 4" then you just wasted the money on a new driveshaft that is already the wrong size. This is just a brief write up I did not cover all of the steps or vehicles some steps will vary with different years, as always our articles are not law, every vehicle is different and we assume no responsibility for damage to any vehicle or persons. |
|
|
|
|
| Special thanks to Advance Adapters: | |
|
Property of Keith Auble and RockModified And may not be reproduced without the Expressed written permission of Keith Auble and RockModified.com Copyright © 2005 All rights reserved
|
|